CAREamics UI
CAREamics provides a napari plugin for running our algorithms with a friendly GUI. Check out the installation instructions to get started.
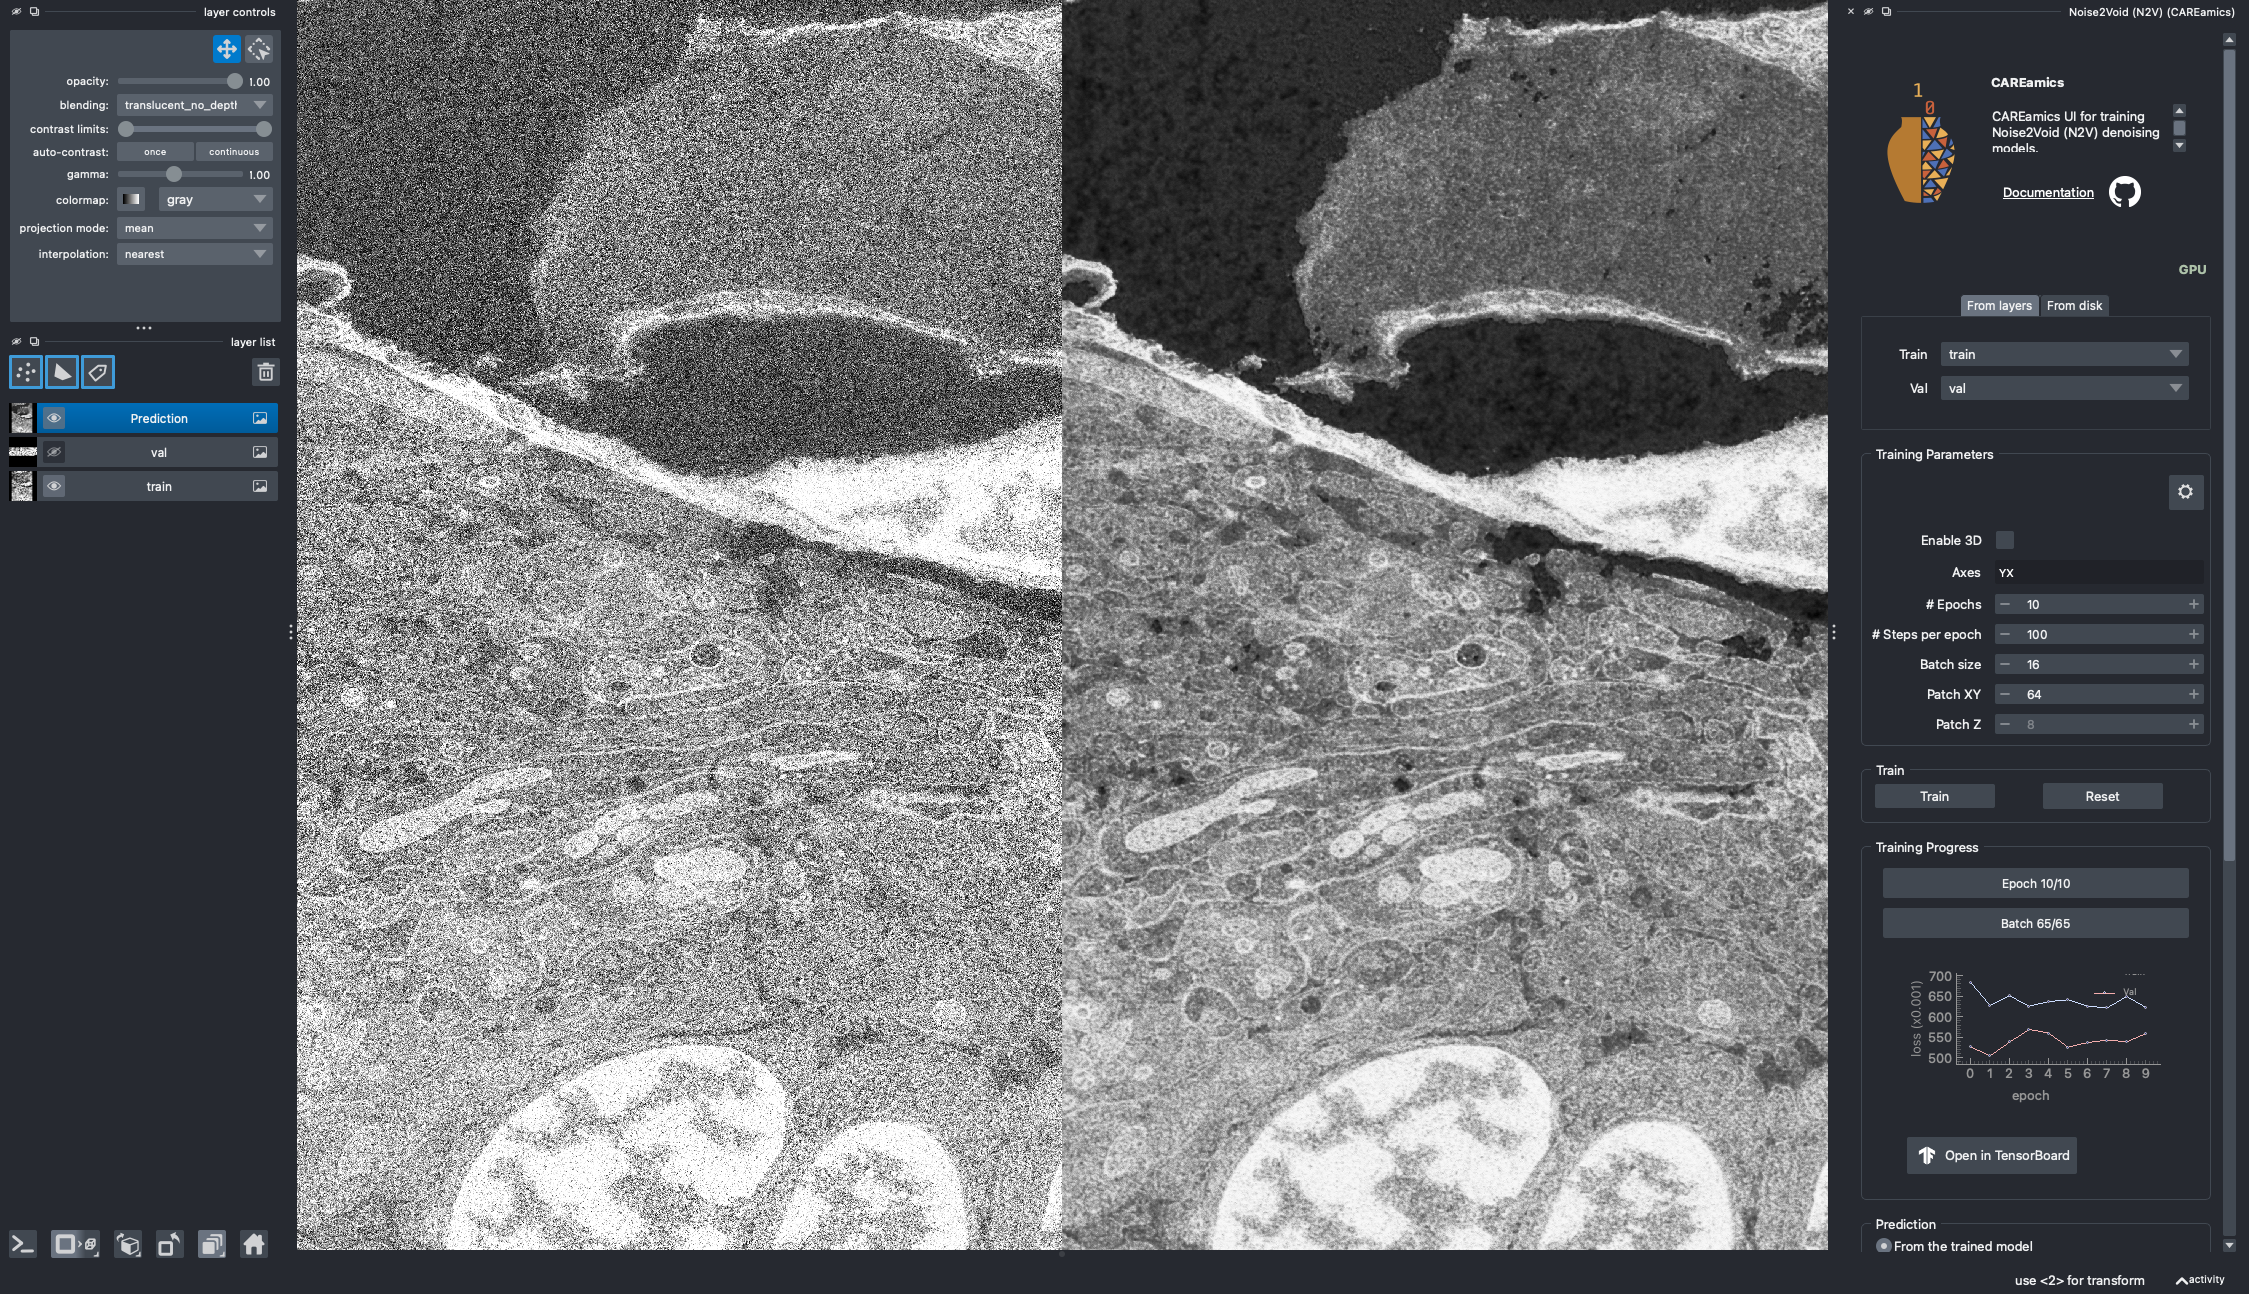
N2V Widget Overview
Overview
The CAREamics napari plugin currently supports CARE, Noise2Noise, and Noise2Void algorithms. For each algorithm, we provided a widget that you can load from the napari Plugins menu.
All widgets are almost similar in UI. Here we describe main sections of a widget:
- Data: You can either use napari layers as input data or select a folder of images for that.
- Training Parameters: Setting the training and algorithm specific parameters.
- Monitor Training Progress: Monitor the training progress via a plot or TensorBoard.
- Prediction: Predict on a layer or on files from a folder.
- Exporting Models: Save the trained model for later use.
Quick start
The easiest way to try out the plugin, is to start the plugin and load a sample dataset. You can do this by running the following command in your terminal:
Then, from the napari Plugins menu, select "CAREamics" and then any of the three provided algorithms:
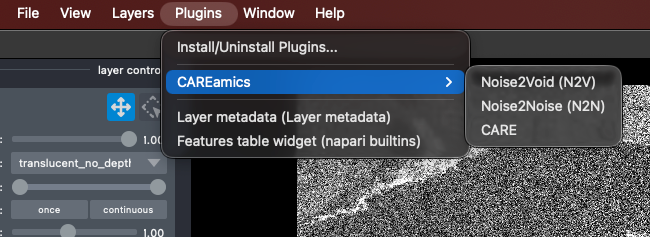
Starting the plugin
For sample data, you can select and (down)load them from: File > Open Sample > CAREamics:
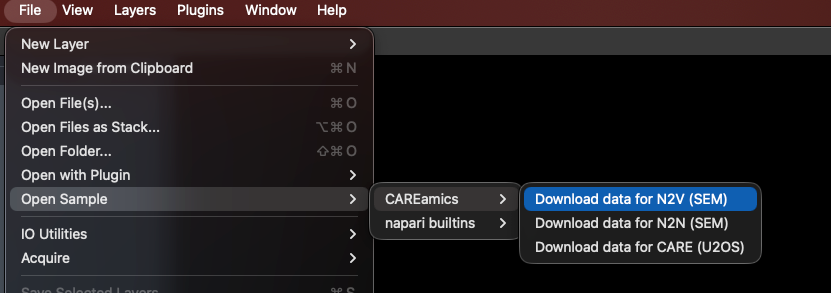
Load sample data
Plugin Walkthrough
In this section, we describe in more details the different elements of the UI.
Having an issue?
In the header of widget, click on the Github icon to open an issue, we will be happy to help you!
GPU / CPU indicator
Next to the algorithm name, you can see a GPU / CPU indicator. This indicates whether the algorithm is running on the GPU or CPU. If you have a compatible GPU, the algorithm will run on it by default. If not, it will run on the CPU.
Data
Loading data can be done either by using images already loaded in napari (From layers), or by loading images from a folder (From disk). The plugin will automatically detect the file format and load the images accordingly. The tab that is selected tells the plugin the source of the data.
Unsurprisingly, the Train data is used for training, and the Val one for validation! When using CARE or Noise2Noise, additional target train and validation data are required.
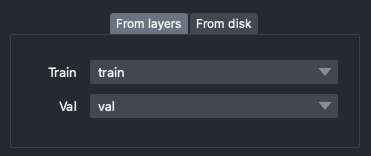
Training Data
Size of the validation data
If your validation data is too large, this will slow down training.
Split validation from training data
If you set the Val data to the same layers or folder as the Train data, CAREamics will automatically split the data. There are two parameters used to control the amount of data used for validation, these are found in the advanced settings.
Loading from a folder
Loading from a folder will not show the images in napari.
Training Parameters
After selecting the training data source, you can set the training parameters:
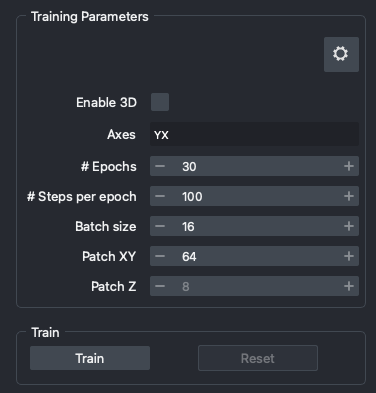
Training Parameters
Here are the meaning of each of the parameters:
Enable 3D: runs the training in 3D. This is only available if you set aZaxis inAxes.Axes: enter here the axes of your data. Accepted values areC,Z,Y,X,TandS.# Epochs: number of epochs for which to train the model. This parameter influences the total training time.# Steps per epoch: number of steps (batches) per epoch. An epoch will end after this number of steps. This parameter also influences the total training time.Batch size: number of images to use in each training step. This parameter influences the total training time, but also the GPU memory used.Patch XY: size of the patches to use in the XY plane. This parameter impacts the GPU memory used.Patch Z: size of the patches to use in the Z plane. This parameter impacts the GPU memory used. It is only available if you set aZaxis inAxes.
Click on Train to start training. Training can be stopped at any time by clicking on the Stop button. The trained model will be saved. You can then Reset the model to start training again from scratch.
What to do when GPU memory is limited?
Often times, you will run out of GPU memory when training a model. This is especially true for 3D data. In this case, you can try to reduce the Patch XY and Patch Z parameters. This will reduce the size of the images used for training, and thus reduce the GPU memory used.
If this is not sufficient, you can also try to reduce the Batch size parameter. This will reduce the number of images used for training at each step, and thus reduce the GPU memory used.
Advanced Settings
If you click on the gear icon in the top right corner of the training tab, you will see a list of advanced settings. These settings are not necessary to change for most users, but can be useful for advanced users.
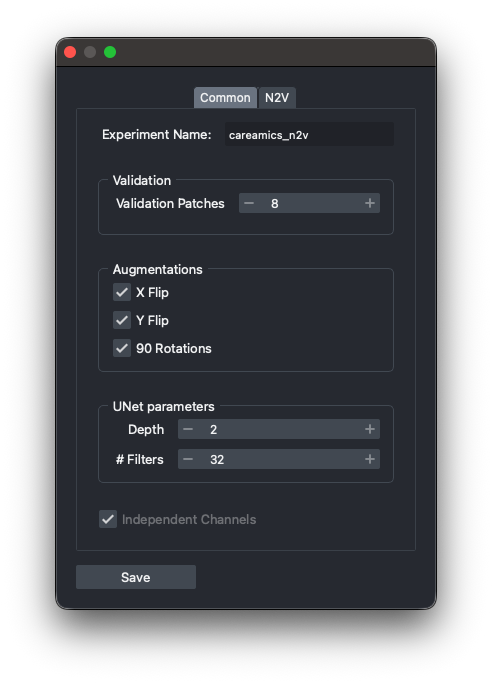
Advanced Settings (Common and N2V specific)
The parameters are the following:
Experiment name: name of the experiment used in the logs.ValidationValidation Patches: minimum number of patches or images used for validation.
AugmentationsX Flip: uncheck to disable the X flip augmentation.Y Flip: uncheck to disable the Y flip augmentation.90 Rotations: uncheck to disable the 90 degree rotations augmentation.
UNet parametersDepth: depth of the UNet. Larger depth means more layers, and potentially a more powerful model. But it may also lead to overfitting, slower learning, and will take more memory on GPU.# Filters: number of filters in the first layer of the UNet. Larger number means more filters, and potentially a more powerful model. But it may also lead to overfitting, slower learning, and will take more memory on GPU.
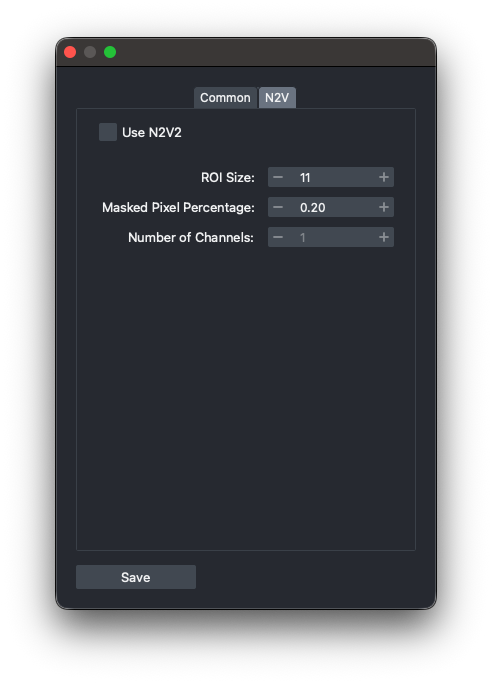
In advanced setting, there is another tab for algorithm specific setting. For example, in N2V widget, you can select the Use N2V2 checkbox to use N2V2 rather than Noise2Void.
Monitoring Training Progress
While training, you can monitor the training progress via a plot or TensorBoard. Click on Open in TensorBoard to access the TensorBoard UI.
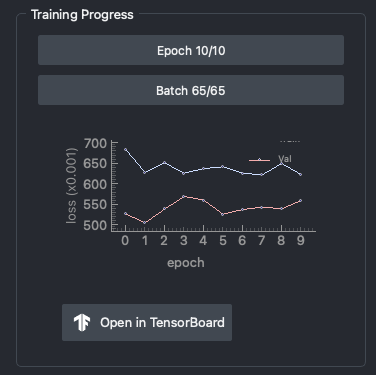
Training progress
Prediction
Once the training is finished, you can predict on a layer or on files from a folder. The tab that is selected tells the plugin the source of the data. Also, you can load a saved model from disk for prediction.
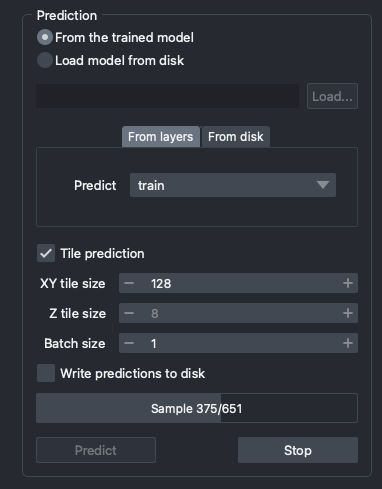
Prediction settings
Large image can be tiled for prediction. If you select Tile prediction, the following parameters will be available:
XY tile size: size of the tiles in the XY plane. This parameter impacts the GPU memory used (less memory used per prediction for smaller sizes) and the duration of the prediction (longer prediction time for smaller sizes).Z tile size: size of the tiles in the Z plane. This parameter impacts the GPU memory used (less memory used per prediction for smaller sizes) and the duration of the prediction (longer prediction time for smaller sizes). It is only available if you set aZaxis inAxes.Batch size: number of images to use in each prediction step.
If you select the Write predictions to disk checkbox, then the prediction results will be saved directly on disk in predictions folder. If you selected predict from files, then you can find the predictions folder next to the selected image folder. Otherwise, you can locate the folder in your default CAREamics home folder which will be <your home folder>/.careamics.
Image is too large
If your image is too large and causes the prediction to fail, you can use tiling to break it into smaller pieces that are manageable by your GPU memory.
Stop button will stop the prediction process! If your image is too large and you set a small tile size, the prediction takes time. You can stop the process and try a bigger tile size then.
Viewing prediction results
When predicting from files and Write predictions to disk is unchecked, the predicted images will be added into napari as layers.
If all images have the same dimensions, they will be added as a stack of images (3D/4D). Otherwise, there will be a layer for each predicted image.
Exporting Models
Finally, you can save the trained model for later use. The plugin supports saving the model as a PyTorch model or as a BioImage.io model.
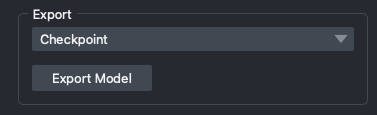
Exporting Models